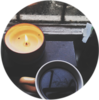
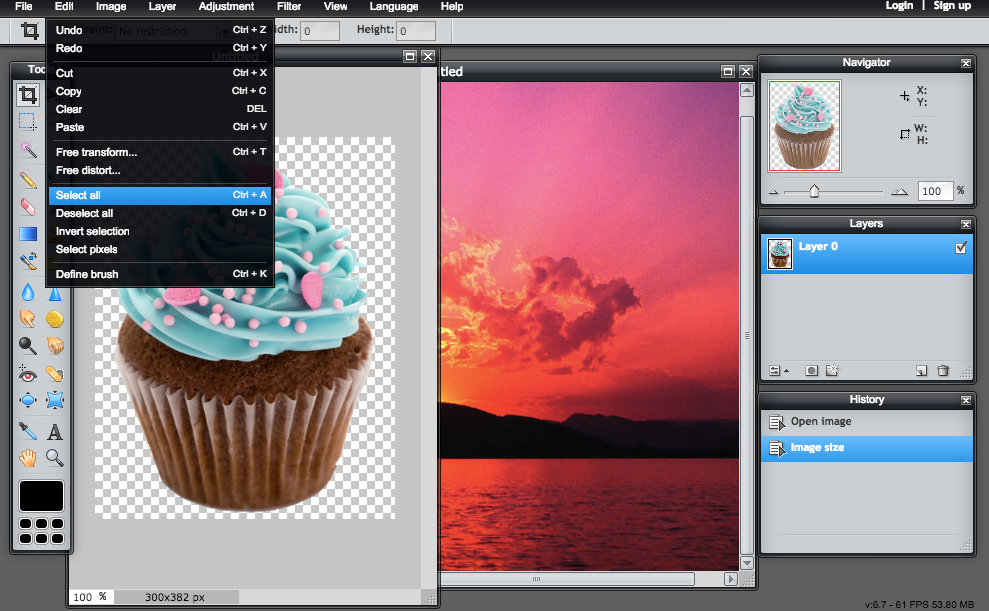
Step 1 - find a transparent picture (with a transparent background). This will be the shape of the silhouette.
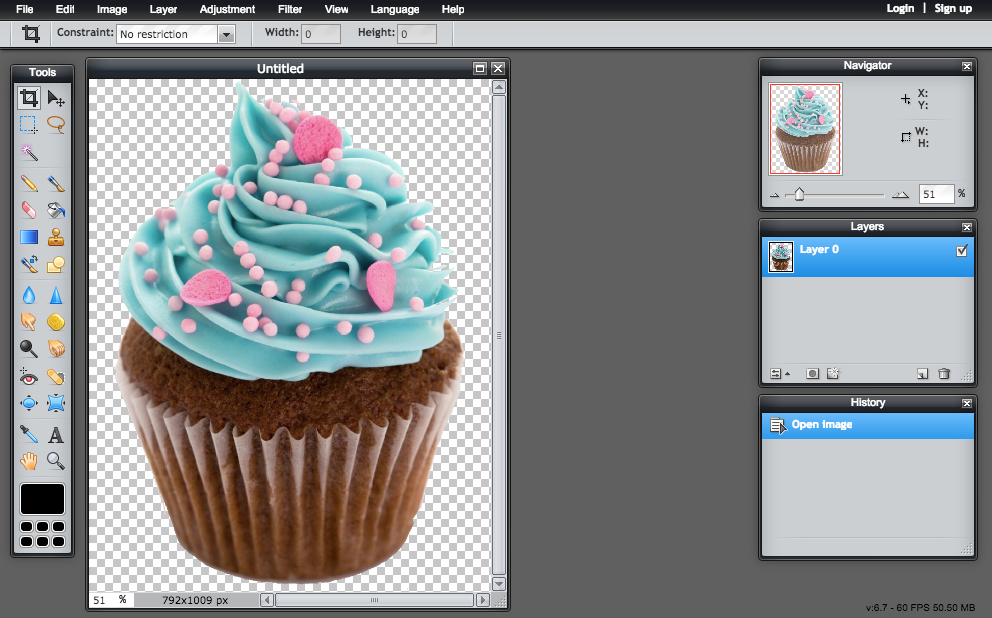
Step 2 - open in pixlr, resize as desired
![Image](http://i931.photobucket.com/albums/ad157/cherrystarluv/tutorial/ScreenShot2015-01-03at122814PM.png)
![Image](http://i931.photobucket.com/albums/ad157/cherrystarluv/tutorial/ScreenShot2015-01-03at122838PM.png)
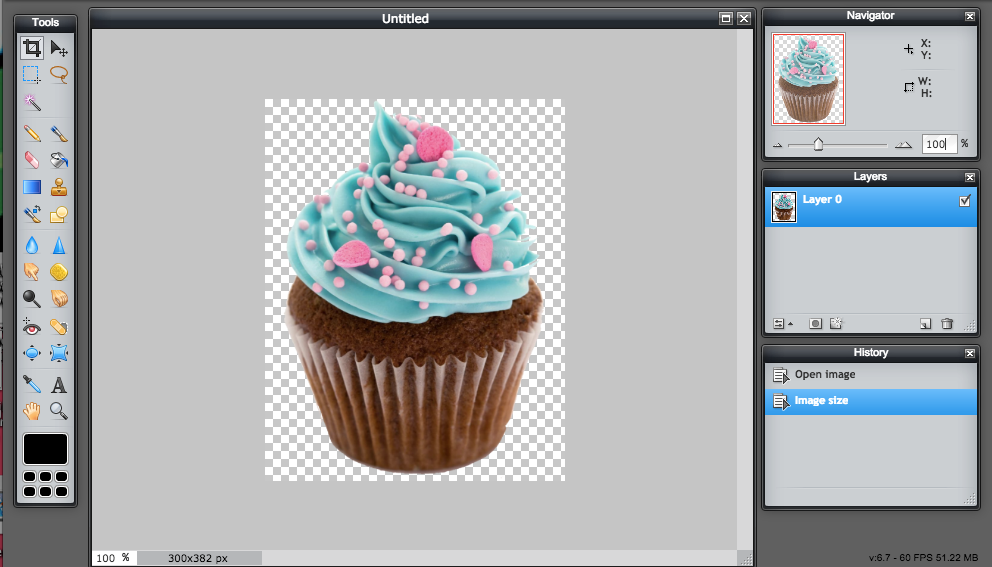
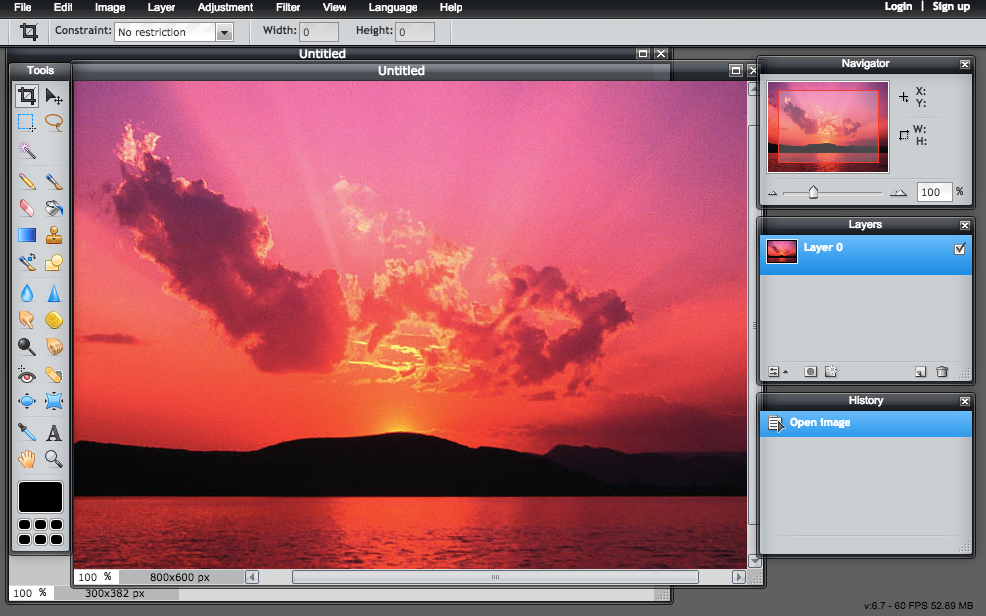
Step 3 - find the other picture you want, and open that in pixlr, too. Make sure to resize it so that a majority of it fits into the first image. Make sure it's not too big or it will look strange. This will be the background inside the shape.
![Image](http://i931.photobucket.com/albums/ad157/cherrystarluv/tutorial/ScreenShot2015-01-03at123130PM.png)
Step 4 - take the shape picture, go to edit -> select all then edit -> copy
![Image](http://i931.photobucket.com/albums/ad157/cherrystarluv/tutorial/ScreenShot2015-01-03at123353PM.png)
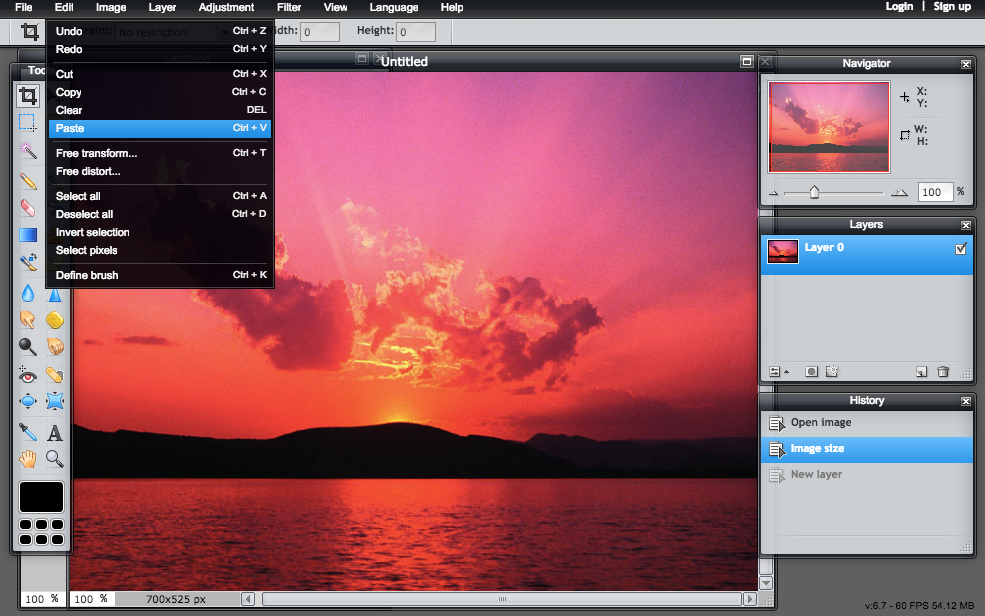
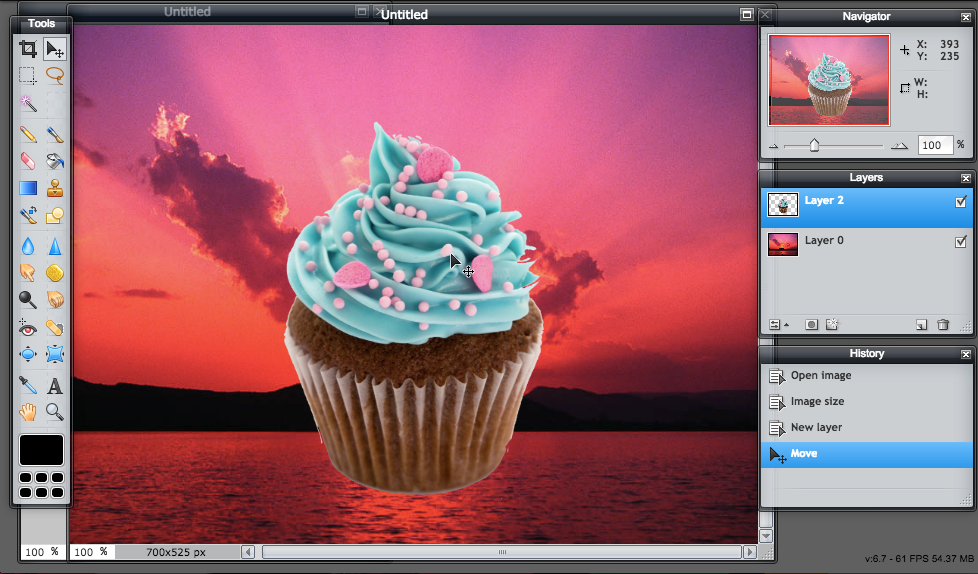
Step 5 - go to the background picture and go to edit -> paste. Use the move tool to move the picture wherever you want the silhouette to be.
![Image](http://i931.photobucket.com/albums/ad157/cherrystarluv/tutorial/ScreenShot2015-01-03at123507PM.png)
![Image](http://i931.photobucket.com/albums/ad157/cherrystarluv/tutorial/ScreenShot2015-01-03at123551PM.png)
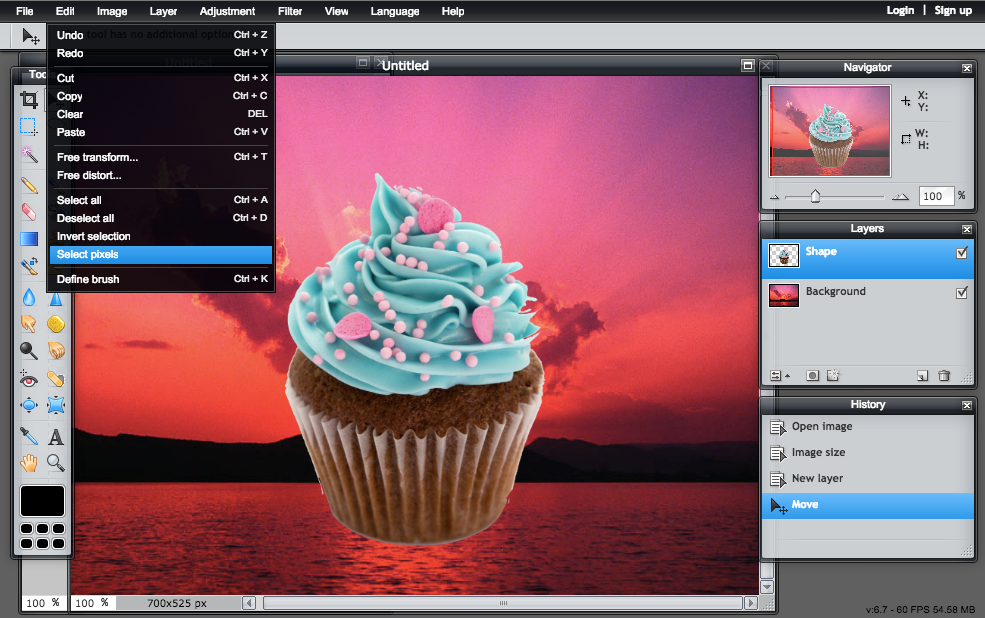
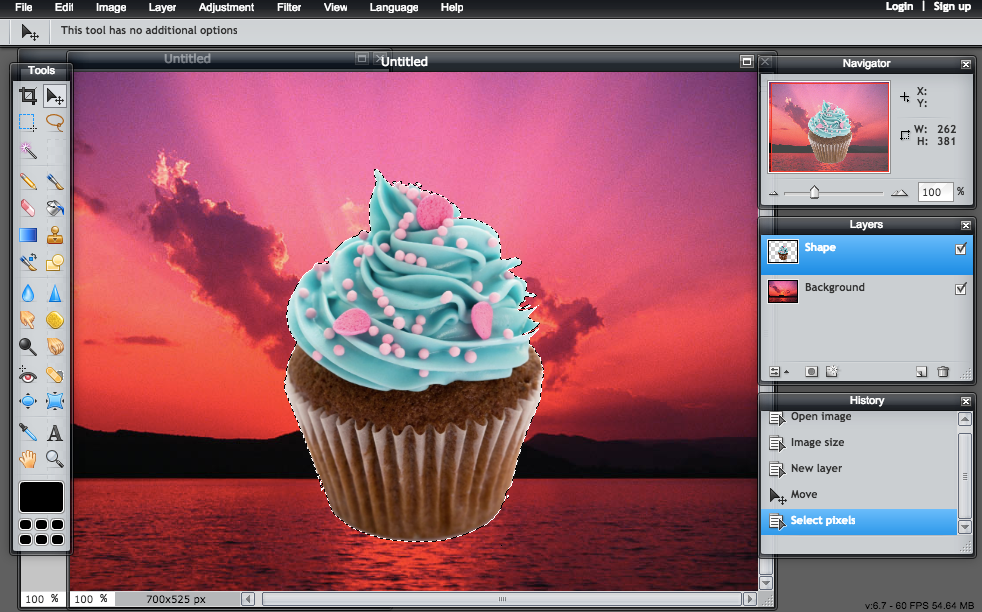
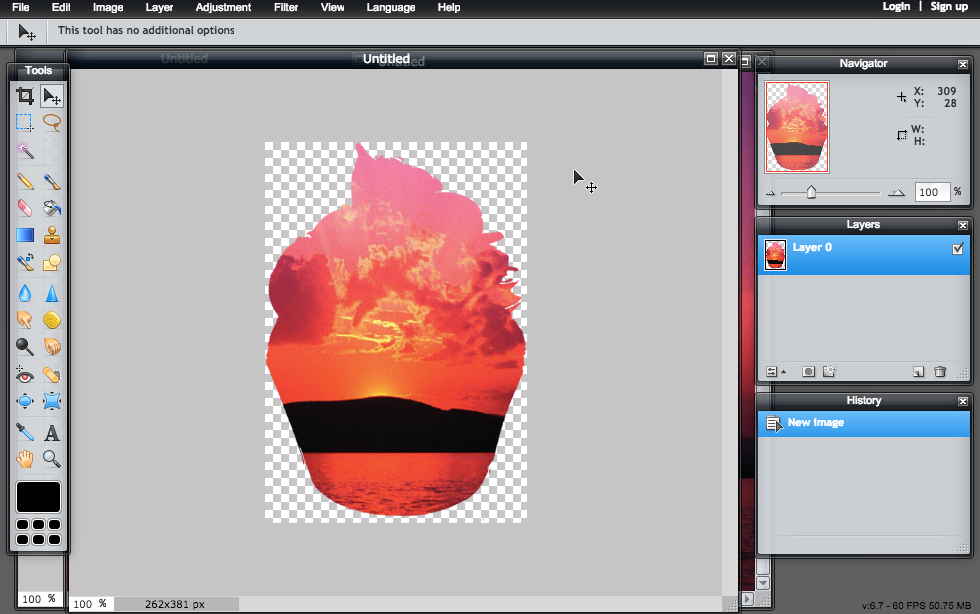
Step 6 - click the layer with the shape image (rename if desired, I did) go to edit -> select pixels.
![Image](http://i931.photobucket.com/albums/ad157/cherrystarluv/tutorial/ScreenShot2015-01-03at123747PM.png)
![Image](http://i931.photobucket.com/albums/ad157/cherrystarluv/tutorial/ScreenShot2015-01-03at123758PM.png)
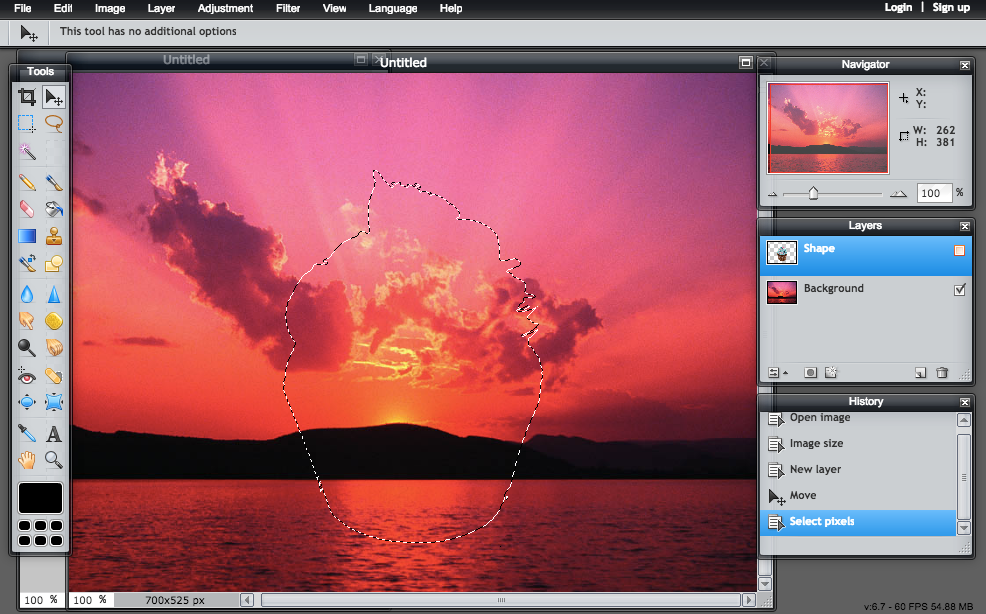
Step 7 - now click on the check box to hide the shape layer and click on the background layer
![Image](http://i931.photobucket.com/albums/ad157/cherrystarluv/tutorial/ScreenShot2015-01-03at123835PM.png)
![Image](http://i931.photobucket.com/albums/ad157/cherrystarluv/tutorial/ScreenShot2015-01-03at123848PM.png)
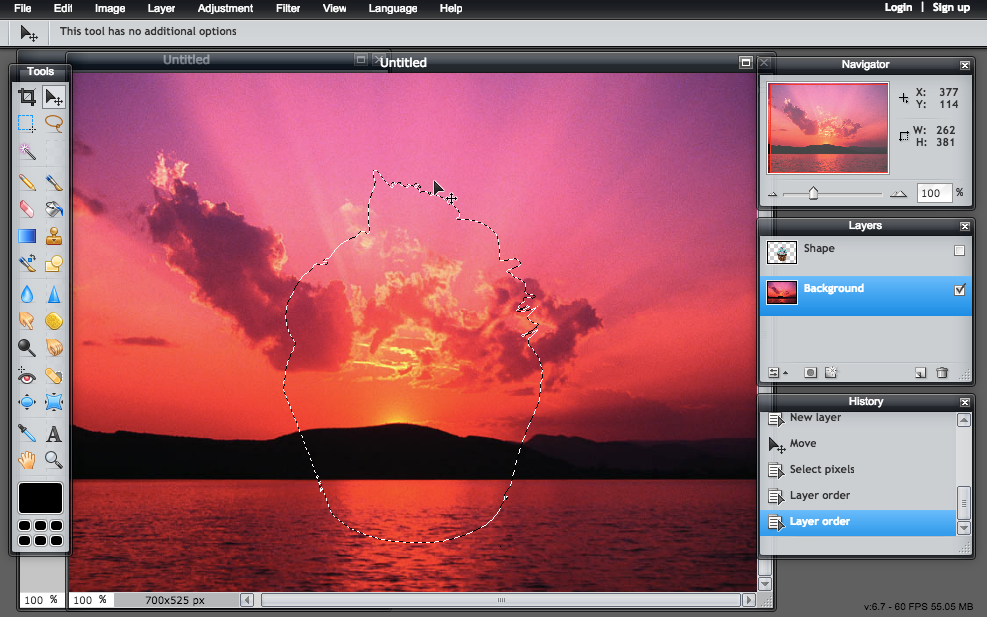
Step 8 - the background layer should be highlighted, so now go to edit -> copy (again)
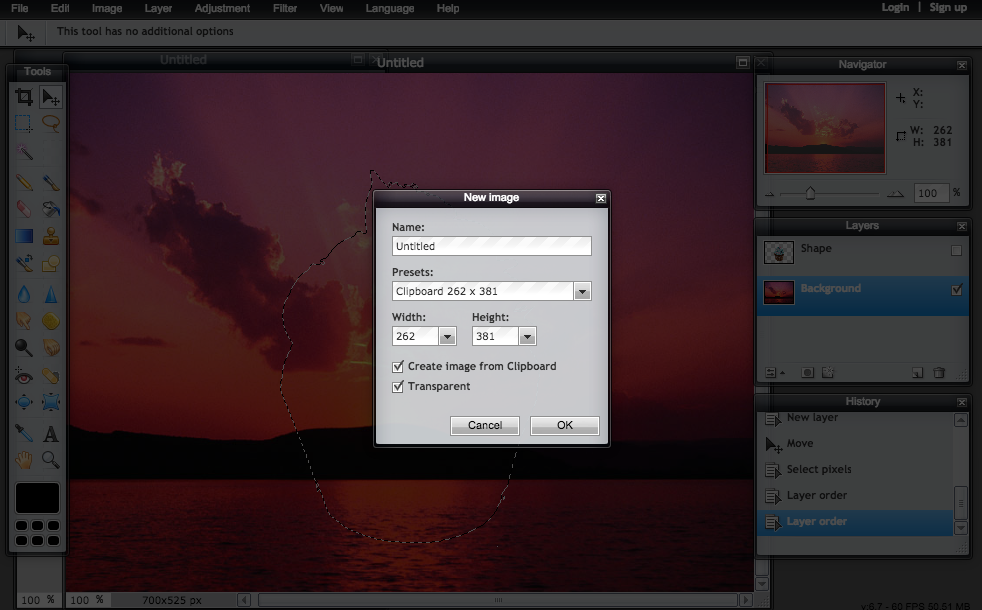
Step 9 - The selected pixels should be copied. Now go to file -> new image and check off both the boxes that say "create image from clipboard" and "transparent" and then hit okay
![Image](http://i931.photobucket.com/albums/ad157/cherrystarluv/tutorial/ScreenShot2015-01-03at123951PM.png)
![Image](http://i931.photobucket.com/albums/ad157/cherrystarluv/tutorial/ScreenShot2015-01-03at124043PM.png)
Step 10 - save it as a .png and you're done!!
![Image](http://i931.photobucket.com/albums/ad157/cherrystarluv/tutorial/ScreenShot2015-01-03at124113PM.png)
Et voila!
![Image](http://i931.photobucket.com/albums/ad157/cherrystarluv/tutorial/cupcakesunset.png)
So majestic.