- made this with goobies in mind, but ur welcome to use this tutorial for non-goobies stuff, of course!
ok now, gonna do my best to explain the steps a little more in-depth:
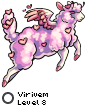
1. pick victim and lighting source
- draw your goo, 45% opacity outside, 100% opacity inside! (tip: i like to put my lines on multiply!)
pick your lighting angle/source/etc
2. 50% multiply gradient
- airbrush a gradient over the majority of it
the darkest part should be the furthest away from the lighting source
use soft/airbrush eraser to tidy it up if the gradient doesn't have enough of a taper off
3. 50% multiply shadow
- airbrush where the shadows are
the location will vary depending on how 3d the object is and where the lighting source is
but a good rule of thumb is to just hit the edges opposite of the lighting
4. 40% add shiny
- airbrush where the light hits
i like to follow where the lines are
5. 25% add spots
- using a hard brush, scatter little dots randomly along the goo (these are trapped bubbles!)
don't forget to do the biggest spot right where the light hits!
6. solid white details
- add a solid white to the center of the biggest spot where the light hits
this is what really makes it pop!
for the tutorial, i used the purple shading color i picked out forever ago for goobies; it's saved in the color palette!
for the examples, i changed up the shading/shine colors to show how they give a different color overall to the goo!
play around with your shading/shine colors and come up with something that you like!!
hope that helps!!
if you have any questions, please drop them here, i'll do my best to answer them!!