Need help with the site/forum/pets? Ask questions and get help from other members here.
 by stitch; » Sat Jan 31, 2015 10:58 pm
My Signature wrote:◤xxxxxxxxxxxxxxxxxxxx◥
why hello there! ❤
I'm stitch. I love meeting new
people, making friends, and
trading here on chicken smoothie!
I always also take signature
requests. just shoot me up a pm!
I'm still learning, though, so I
might even be able to make you
one for free!
◣xxxxxxxxxxxxxxxxxxxx◢
It's so plain, though. Any ideas on what I should add onto the right side? I ordered something from a signature shop so this is just going to be used for a short time. c:
-

stitch;
-
- Posts: 6007
- Joined: Thu Jan 02, 2014 6:57 pm
- My pets
- My items
- My wishlist
- My gallery
- My scenes
- My dressups
- Trade with me
-
by diana, » Sat Jan 31, 2015 11:52 pm
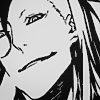
Katsuko. wrote:Give it a try :3
As you could tell, I'm not the best at getting rid of the background. I had to use the lasso, and it took forever. I can't do it Dx Howwww
 ═══════════════⋆⋅★⋅⋆═══════════════┏xxxxxxxxxxxxxxxxxxxxxxxxxxxxxxxxxxxxxxxxxx┓xi"deep into that darkness peering, long i stood there wondexxxring, dreaming dreams no mortal ever dared to dream."┖xxxxxxxxxxxxxxxxxxxxxxxxxxxxxxxxxxxxxxxxxx┚┏xxxxxxxxxxxxxxxxxxx┓┏xxxxxxxxxxxxxxxxxxx┓xx"all that we see or seem isxxxx"and so being young, andxixxbut a dream within axxxxxxxxdipped in folly, i fell inxxxxxxxxxdream."xxxxxxxxxxxxlove with melancholy."┖xxxxxxxxxxxxxxxxxxx┚┖xxxxxxxxxxxxxxxxxxx┚
-

diana,
-
- Posts: 21368
- Joined: Sun Jan 12, 2014 5:14 pm
- My pets
- My items
- My wishlist
- My gallery
- My scenes
- My dressups
- Trade with me
by agile » Sun Feb 01, 2015 12:20 am
@Chocco
Go to Online Image Editor and go to blood fill transparency. This takes basically a minute.
she/her
たくさんの日本語の勉強していても、まだ上手にならなかった…
しかし、私にメッセージを書かない? ʕ·ᴥ·ʔ
私はもっと学びたいから!ありがとう~!
watching: fruits basket | playing: OW2 | listening: j-rock
-

agile
-
- Posts: 5667
- Joined: Thu Apr 03, 2014 8:35 pm
- My pets
- My items
- My wishlist
- My gallery
- My scenes
- My dressups
- Trade with me
by Enuri » Sun Feb 01, 2015 12:57 am
PIXLR PROJECTThe most useless-looking tool could make your signature shine.
• ------------------------------------ •
Welcome! Of The Falls and I have decided to make the Pixlr Project.
Anyone can make a tutorial where they can show how to use the tool.
To be added to the Table of Contents, it must be approved by
Of The Falls. • ------------------------------------ •Tool No. 1= The Eraser Tool.  Now everyone likes the eraser tool, and it has been crucial in the Removing background
tutorial. The eraser can also aid you in making your signature look better- but how?
1= Create shapes
You heard me. Well- you saw my text!
Creating shapes with eraser is possible. Take a look at what I made.

How did I do that you ask? Well, first, make sure that you have clicked on the eraser, and then look at the top, and click that. This is what should appear.

There are many shapes, and you can use that to make your images look better. Looking over to the right, I have circled the ''Create brush'' option. If you click that, you can make your own brush, and it looks something like this:

Go ahead! Be creative. If you don't want to make your own brush, there are shapes already made for you.
Alright, now, lets get these shapes onto our image. Before you do anything, look up at your main box on the top, and click File. Once you have clicked File, click the option New image, and tick off transparent, and make the measurements same as your image. Below will show you how to do it.


Then, click okay. This is what mine looks like.

Alright. Now, click on your non-transparent image, then go up to the main box. Click Select all. Once you have, a dotted line should appear around your non-transparent image.

Alright, now, looking up on the same bar, you shall find the ''Copy'' option. Click that.
Now, go over to your transparent image and click it, then go up to edit and click Select All again. Then, on the same bar (The Edit bar) Click paste. Viola! You have moved the non-transparent image into your transparent image. Now, looking over at your Layers box, make sure that the transparent layer is under your non-transparent image. This is what my Layers look like:

Okay. So, now, lets go back to our eraser and click the box again. Choose the shape you want, and edit it. There are a lot of options, like resizing the eraser, or spacing, or hardness.
Spacing: Let's say you set your spacing to 10 pixels. That means that as you drag the eraser tool over a space, it will actually erase at every 10 pixels it comes to. If you set spacing to 100, you will definitely see the difference because there would be big gaps of 100 pixels between your eraser marks.
Hardness: This mostly applies to the eraser brushes that have the faded edges. If you set it with a high hardness, there will be less of that faded edge and more of the eraser would be solid. If you set it to low hardness, then the opposite would happen.
(Credit to Of The Falls for explaining the meanings to me.)

Final step. Make sure that on the layers, your non-transparent image is highlighted. Once you have, start click on your image, erasing the image's selected area. Like, my eraser shape is a star, and when I click on my image, it creates a star hole. Do you get what I mean? Place as many shapes you want on your image.

Then, go up to File on the main box, and click save it as a PNG image. Now go upload your image onto an image hosting website, and there you go! That is one creative way to use the eraser.
Remember guys, the eraser is a very, very important tool. Check out Off The Fall's Tutorial about removing backgrounds. The eraser plays a big role in removing the background.

Last edited by
Enuri on Sun Feb 01, 2015 2:07 am, edited 2 times in total.
-
Enuri
-
- Posts: 4826
- Joined: Tue Dec 24, 2013 3:02 am
- My pets
- My items
- My wishlist
- My gallery
- My scenes
- My dressups
- Trade with me
-
Who is online
Users browsing this forum: Admantx [Bot] and 2 guests