So a user asked me how I designed this kitty and so here we go! Small tutorial, hope it helps some of you!
DISCLAIMER:
I am not really an expert on skys. ouo But this is my style and I hope it helps inspire others to develop theirs.
Also, feel free to go nuts and experiment further!
Art doesn't have any exact rules, it's your imagination afterall! Go for it.
- - -
1
First, draw the base colors. The sky is lighter to the ground and darker as it goes higher, both day and night! You can go with any typical sky colors, from blues, to blacks, to sunset hues.
2
Usually I use the PEN brush (any visible opacity) to make the stars. Draw each individually. The scatter brush helps sometimes, if set high enough,along with spacing, but I suggest first doing as many individually as possible. Use brush size 1 or 2 for most stars. Also, draw some bigger and some smaller, and some like a “sparkle” or + shape. White and off-white colors, as well as yellows, work best!
3
To make it look more “sparkly” duplicate the star layer and set it on overlay. Then use the “blur” tool (shaped like a teardrop) to blur it; make sure afterwards to set lock alpha on the layers and recolor the new blurred marks completely white (as oekaki makes blurred images have black edges).
After that, lower the opacity of the non-blurred stars (try not to go beyond the 40s). You can also duplicate the blur level to brighten it! For extra sparkle, use the “add” layer setting, although be careful, and be sure to put the opacity down or it might look too stark.
4
Feel free to add extra glow with airbrush! Set it on “add” or “overlay” so it looks brighter.
5
You can then (if you want to add a more fantasy or colorful look) do any of these to add extra color!
You can edit the ORIGINAL base sky layer to mix up different hues.
Or, you can make a new layer/duplicate the sky layer, move it above (or under, depends) the star layers and overlay/add/burn/screen it (play around with settings!).
You can also try your best to avoid using any settings, but you’ll have to figure out the exact colors you want!
There are really no rules to this, just experiment until you have something you like!
6
Here I just have the sky later duplicated and overlaid to look a “richer” hue. I’ll stick with that one.
7
Now, clouds!
Draw the outline of the clouds first. Technically you can do this however you want, however the light from the moon/stars/sun should be hitting the whitest/most clear parts.
Use the airbrush for this! Don’t be afraid to erase and start over, also you can, with the “faded” eraser, make the edges lighter in some parts.
8
From there, lower the airbrush’s opacity. For my basic “wispy” looking clouds, I leave only the outlines darker and the rest pale and visibly see-through. You can also overlay/add/screen this layer as you will.
If you want a heavier looking clouds, for a thunder storm, add grays, blacks, and dark blues. The bottom cloud is a quick example here!
Afterwards:
GO NUTS! Have fun! Skys are fun to play around with and don't be scared of them. c:
Extra note:
Don't forget to look up references, too! Though it's up to you how realistic your drawing'll be.
- - -
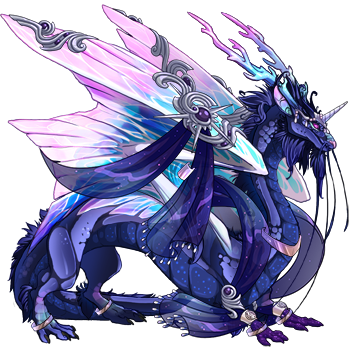
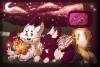
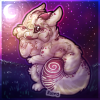
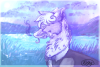
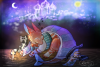
I have some examples (please do not copy, just examples) of my art that I've drawn galaxy and skys on, with a similar fashion to this tutorial! Click to see full size.

DISCLAIMER:
I am not really an expert on skys. ouo But this is my style and I hope it helps inspire others to develop theirs.
Also, feel free to go nuts and experiment further!
Art doesn't have any exact rules, it's your imagination afterall! Go for it.
- - -
1
First, draw the base colors. The sky is lighter to the ground and darker as it goes higher, both day and night! You can go with any typical sky colors, from blues, to blacks, to sunset hues.
2
Usually I use the PEN brush (any visible opacity) to make the stars. Draw each individually. The scatter brush helps sometimes, if set high enough,along with spacing, but I suggest first doing as many individually as possible. Use brush size 1 or 2 for most stars. Also, draw some bigger and some smaller, and some like a “sparkle” or + shape. White and off-white colors, as well as yellows, work best!
3
To make it look more “sparkly” duplicate the star layer and set it on overlay. Then use the “blur” tool (shaped like a teardrop) to blur it; make sure afterwards to set lock alpha on the layers and recolor the new blurred marks completely white (as oekaki makes blurred images have black edges).
After that, lower the opacity of the non-blurred stars (try not to go beyond the 40s). You can also duplicate the blur level to brighten it! For extra sparkle, use the “add” layer setting, although be careful, and be sure to put the opacity down or it might look too stark.
4
Feel free to add extra glow with airbrush! Set it on “add” or “overlay” so it looks brighter.
5
You can then (if you want to add a more fantasy or colorful look) do any of these to add extra color!
You can edit the ORIGINAL base sky layer to mix up different hues.
Or, you can make a new layer/duplicate the sky layer, move it above (or under, depends) the star layers and overlay/add/burn/screen it (play around with settings!).
You can also try your best to avoid using any settings, but you’ll have to figure out the exact colors you want!
There are really no rules to this, just experiment until you have something you like!
6
Here I just have the sky later duplicated and overlaid to look a “richer” hue. I’ll stick with that one.
7
Now, clouds!
Draw the outline of the clouds first. Technically you can do this however you want, however the light from the moon/stars/sun should be hitting the whitest/most clear parts.
Use the airbrush for this! Don’t be afraid to erase and start over, also you can, with the “faded” eraser, make the edges lighter in some parts.
8
From there, lower the airbrush’s opacity. For my basic “wispy” looking clouds, I leave only the outlines darker and the rest pale and visibly see-through. You can also overlay/add/screen this layer as you will.
If you want a heavier looking clouds, for a thunder storm, add grays, blacks, and dark blues. The bottom cloud is a quick example here!
Afterwards:
GO NUTS! Have fun! Skys are fun to play around with and don't be scared of them. c:
Extra note:
Don't forget to look up references, too! Though it's up to you how realistic your drawing'll be.
- - -
I have some examples (please do not copy, just examples) of my art that I've drawn galaxy and skys on, with a similar fashion to this tutorial! Click to see full size.