by Error » Sat May 11, 2019 1:36 pm
IntroductionWelcome to my tutorial! It might be a little complex/difficult to get through at first, but hang in there! This is the drawing process I've used for several drawings in the past, it can be done for any type of creature and is a process that I call "making a mess, then cleaning it up."
The first things you need to know is the main brush setting, this will be you go to brush throughout the entire "painting" process. I rarely use any other brush and the ones that I use won't differ much from their default settings.
Painting Brush
Pencil Tool
Brush Size: 10 - Pen Pressure On
Opacity: 100 - Pen Pressure On
Spacing: 0
Anything not listed is not touched/moved from the default
Note: The brush size is 10 for most of the large chunks of fur, but it can be resized for smaller detailed areas or made larger for even larger work areas. It does not need to remain at 10.
The second thing you need to know is that all the folders have info in them. They may have individual steps or show how the layers were set up. I encourage poking around everything and getting to know what each section is about before moving on to the next! Now, without further ado, let's start the tutorial!
▬▬▬▬▬▬▬▬▬▬▬▬▬▬▬▬▬▬▬▬▬▬▬▬▬▬▬▬▬▬▬▬▬▬▬▬▬▬▬▬▬▬▬▬▬▬▬▬▬▬▬▬▬▬▬▬▬▬▬▬
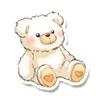
Part 11. Make a really rough sketch of the cat or creature you wish to draw. By rough I mean awful rough, really bad, just keeping in mind the space between the character and the title. It helps to draw some boxes where the title is going to be to see how much space you have.
Don't worry about this part at all. You can use any brush setting you like to sketch for this step!
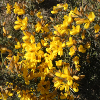
Part 2Once you're happy with the placement of the rough sketch, make a clean sketch. During this process it is handy to have references of real cats at hand. Use them to figure out the placement of the skull, the cheek bones, and the way fur falls on the cat. It is really useful to have a picture that matches the face shape/body type of the character you're drawing.
Part 31. Make a new layer below the cleaned sketch. Then take a brush with the following settings
Pencil Tool or Brush Tool
Brush Size: 90 - Pen Pressure On
Opacity: 255 - Pen Pressure Off
Spacing: 0
Use this to fill in the lineart, making a solid base to work with.
2. Using the same brush you used to fill in the base, added the markings/additional colors on the character. Make sure to lock the transparency of the base layer. You can do this on a clipping mask, but since the piece will be merged down later it isn't necessary.
Part 4Will require a little bit of color theory! I failed to add this into the tutorial itself, as my hand writing is so bad and the piece is so big already. I'll go into more depth about it here.
This step you must add the shading and highlight layers.
1. Shading
The first step is to pick a good shading color. I normally pick a color that light in color, desaturated (so more gray is in it) and purple/blue in tint. Never shade with black or gray! It will make your drawing look muddy in the end.
To apply the shading:
1. Create a new layer
2. Make a clipping mask
3. Make the layer a "Multiple" layer
4. Pick a light source
5. Apply shadows where you think the light won't reach
This process can be done with whatever brush you'd like. In the case of this drawing I used the same brush for basing/adding the markings. However, normally, I drop the opacity slightly and add pen pressure, this can add some softer edges, but isn't necessary.
2. Highlights
The highlight will normally be the same color as the light source. If your character is in the sun, then the light will be yellow for example. Normally I pair blue shadows with a brownish yellow light source, this is because they are opposite each other on the color wheel. Therefore making them more complimentary towards the other. In the case of this drawing I used a blue light source to keep the drawing colder in tone instead of introducing a warmer color like red or yellow to the picture.
To apply the highlights:
1. Create a new layer above the shading layer
2. Make a clipping mask
3. Make the layer a "Overlay" layer
4. Pick a light source
5. Apply the highlights where you think the light will hit
6. Add some bounce light along the darker side for variety in the colors
I use the same brush as filling in, but I drop the opacity a decent amount and use pen pressure on the brush. Allowing a softer/lighting tone to be applied to the drawing.
As for the second set of highlights. The steps are the same, only you use an "Add" layer to apply a sharper highlight to the eyes using the same color as what you used for the "Overlay" highlight layer.
3. Colored Lines
The third step is to change the cleaned sketch into a "Multiple" layer and pick a dark color to recolor them as. In this case, I used a dark blue to add a different depth to the more purple shadows and the light blue highlights.
At this point, all the colors you will use to paint with are on the palette and you shouldn't have to pick new colors often. Outside of maybe picking a lighter/darker color when needed for additional depth. I used the dark blue lines of the sketch as the darkest color and the white on the cheek hit by the light as the lightest color.
Part 5At this point I merged together all the layers and remembered to flip the drawing. Using the Flip Vertical option I was able to see some mistakes in the early cleaned sketch: the eye was too high and the neck was too long.
I highly recommend flipping the image when you're still in the sketch stage and not at this point, but I wanted to show that you can easily fix such a mistake.
1. Use the square select tool to select the areas you want to fix.
2. In the case of the eye: copy/paste the eye onto a new layer and move it down, ignore the harsh edge/additional eye color that might peak out. This will be fixed when you start painting.
3. Merge down the layers and then flip it back to the way you want it to face.
Part 6 This is the point where you start painting the drawing. This is a tedious process and will take some time. You will rely heavily on only two tools: your pencil brush and the eye dropper. Use the eye dropper often and a lot to pick up colors from the palette to blend out with the rest. This will slowly smooth everything over.
1. It is at this point that you need to set up your pencil brush to the painting brush settings found in the introductions up there. Set up the eraser the same way so that you can clean up the edges of the cat character.
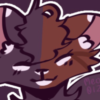
2. Start with the eyes. Follow the eye tutorial in the "Mini Tutorial" folder for a step by step image of how to paint the eyes.
- Look at pictures of cat eyes and try to mimic the way the iris looks
- Make sure to make the eye "round" by adding shadows around the edges and at the top where the eyebrow casts a shadow down onto the eye.
- Shape the eye a bit at this point, but don't worry about the messy edges as they will be fixed when you start drawing the fur.
3. Do the same to the other eye, but keep in mind of the shadows. This eye was darker because it was sitting in the shadows and didn't get as much light as the other eye.
4. Begin painting around the eye. Look at pictures of real cats to see how the fur pattern moves around the face. (images: 4-6 show this process)
5. At this point, I decided to move the ears with the select tool, doing the same thing as what I did when fixing the eye/neck. I copy/pasted the ears onto their own layer and moved them into place, then erased the remaining ears below before merging the layers down together.
Layers 8-10 show the process of painting the ears and adding the fur tufts.
To make the fur tufts use a light color to draw the strands of hair on a new layer, then use the eraser with the same settings to make them look more natural and hair like. Once you're pleased with how it looks, merge this layer down.
6. Roughly blend the fur on the neck using the same process as the face, only do it faster/more messy and with a larger brush. Keep in mind the direction of the fur growth, you're just giving yourself a smoother base to work off of. In Layer 12 make your brush smaller and begin to smooth out the colors and add strands of hair, your brush strokes should be in the direction of the fur growth.
Layers 13-14 are there to show the final details: adding the scar, eye highlights, and muzzle details. These processes can be found in the "Mini Tutorials" section in step-by-step format.
7. This is the final few steps in the drawing process. Using the airbrush with the default settings (only change Spacing down to 0%), you will add some more shading and highlights.
Shading
1. Pick a color similar to the other shadow colors, I picked a light blue.
2. Create a new "Multiple" layer and clip it to the base drawing
3. Dark the shadows near the neck, in the eyes and ears, and any place that needs more darkening up
Highlights
1. Pick a color that compliments the rest of the drawing. To lighten things up a bit more and to add a more natural tone to the character's design, I added a tan color as the highlight.
2. Create a new "Overlay" layer and clip it to the base drawing, it needs to be above the multiple layer.
3. Add additional highlights to the spots where the light hit and where you added highlights earlier/where you feel it needs it. If there is too much and you need it softer, use the soft eraser to soften up the colors.
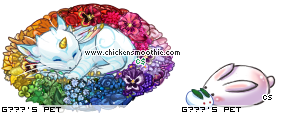
Inner Glow
1. Create an "Add" layer above the "Overlay" layer.
2. Using the same color as the background color: add a ring around the character, make sure it is white around the edges.
3. Take the soft eraser and gently remove the larger white chunks until what is left is a soft white glow around the edge with a slight hint of color.
Congrats! You are now finished with the cat design! The next step would be to add your title to the drawing then color the text, the cover, and the stars all the same color. Which will normally be a darker color than your chosen background color.
▬▬▬▬▬▬▬▬▬▬▬▬▬▬▬▬▬▬▬▬▬▬▬▬▬▬▬▬▬▬▬▬▬▬▬▬▬▬▬▬▬▬▬▬▬▬▬▬▬▬▬▬▬▬▬▬▬▬▬▬
Mini Tutorial DetailsSome further info/explanation for the mini tutorials and how to follow them!
Blending Tip
This tutorial shows how to blend the colors together using the Painting Brush settings provided.
The top row shows a light brownish gray being mixed with a pink, by drawing lightly over the brownish gray I am able to select the new color created and paint with it. Resulting in a desaturated pink color.
The second row shows exactly how this process works when blending two sections together, by picking up the middle color created I can now blend between the lighter brown gray and the darker pink, creating a row blend between the two. This is done by picking up the colors created with the eye dropper and placing them where needed.
Scars and Whiskers
Scars
1. Add a dark skin color
2. Add highlights around the middle section of the skin, mostly where the light would hit, keep in mind the fur length. Keep the scar color darker around the edges of the fur.
3. Pick up the fur color near by and pattern it into the scar, making a rough patch of fur blending into the bare skin.
Whiskers:
1. Add a color darker than the muzzle's base color to the muzzle in a spotty line pattern.
2. Blend over this pattern with the light color around the muzzle, creating small indents/dot patterns on the muzzle
3. Draw white lines straight from the indents, add a variety of lengths for more interest
4. Take the soft eraser and gently tap around the white lines, erase lightly around the edges and keep the middles light, this will create a sort of shading/highlight system for the whiskers.
Eyes
1. Start with your base colors/shading set up from earlier.
2. Begin pulling down the dark colors from the sketch into the top of the eye, the pupil, and add begin to add a pattern to the iris
3. Continue to follow the natural pattern of an iris, picking up colors often randomly from the eye itself, jumping between light and dark, and keeping in mind the light source.
4. Define the pupil shape more, use a light color to outline the pupil.
5. Add some final depth to the eye by adding shadows around the corners/edges.
Eye shine
1. Make a new "Add" Layer. Using a light color selected from the eye, add a fat rainbow to the top half of the eye.
2. Drop the opacity of the "Add" layer to a point where the eye looks smooth/glassy and not a harsh white. Take the soft eraser and erase the inner side (around the iris/pupil) to soften up the highlight.
3. On a new "Add" layer, add additional strong white spots to the eyes and to the edge of the eyes. Use the soft eraser to soften up the harshness of the layer.